Monday, April 5, 2010

Easter 2010

Here's a collage of Blake and Jayden putting stickers on plastic eggs for the Egg Hunt.

How'd that get in there?


Collage of Jayden looking for her Easter basket


Our dinner table and Easter cake

Now that Easter is over, I can get back to my project.

Tuesday, March 30, 2010

Photo Room Divider Tutorial - Step 5

Tools for this step:

Hack Saw
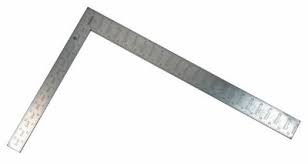
Carpenter Square
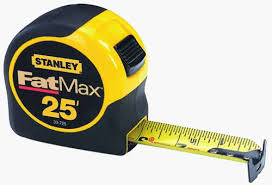
Tape measure
Welder (We used a stick welder)
Grinder

Materials for this step:

3/8" hollow rod ( we got a 3' piece, but you'll only need less than 1/2 of it)
5 - 5/16" Square U-Bolts
Welding Rods

We're almost finished with the construction!

A hack saw works better for the cutting in this step, since the pieces are so small and not very difficult to cut by hand. Theoretically, you could the whole project with a hack saw, if you don't have a chop saw, but it will take a lot longer and take a lot more effort. So, cut the u-bolts in half so you have 2 identical pieces of each.  Next, cut off the threads. If you have need for 1 1/2" threaded rod, keep the pieces, otherwise, toss them.We needed 9 hinges, so there is 1 half bolt left with threads on. This could be used as a "bolt in" bracket if there is ever a need. You'll end up with 2 L shaped rods from each bolt. Cut the hollow rod into 9 pieces about 1/4" longer than the long side of the L shaped rod. Save the rest 
of the rod for another project. These 2 pieces make 
up one complete hinge.

Weld the rod ends of the hinge into place along one side of each panel. Keep the  rod side on the same side of each panel so, you don't end up with 2 rods together and 2 pins together. Next, stand up the panels and place the pin in the rod; then clamp under the pin to hold it in position and weld it in place.

So, here's a picture of what the hinges look like. You won't see the whole project until I have it painted, which is the final step. There is a surprise touch that I've 
added that I hope you like.

Sunday, March 28, 2010

Photo Room Divider Tutorial - Step 4


Tools for this step:

Chop Saw
Carpenter Square
Tape measure
Welder (We used a stick welder)
Grinder

Materials for this step:

3/8" metal rod 
        Per section for this step:
Various sizes (you have to measure)
Welding Rods
Plywood Sheet from step1
Scrap pieces of board from step 1

We're getting closer....

Now that all the frames are welded in, measure for the remaining vertical pieces between the frames, the top of section to top of frames and the bottom of section to bottom of frames. Cut these pieces and weld in place. 


We used a scrap piece of board top 
make a template, cut to the width of 
half  of one of the spaces. Be sure to 
always use the spacer on the same 
side to keep the spacing consistent, 
top to bottom.


Repeat for he remaining sections.


This is what we have so far. We didn't get to the hinges today, but hopefully tomorrow we will figure those out.
I know this seems like it is taking a
long time, but we have to work 
around our daily full time work.

Saturday, March 27, 2010

Another Blog

I moved the Feats and Accomplishments page to it's own blog. I didn't like that you can't post to a specific page, only the home page. I felt each item should have it's own posting/page. I may do that with the plans page, which is still under construction anyway, in the future too.
Here's the URL:http://tru-featsandaccomplishments.blogspot.com/

Wednesday, March 24, 2010

Photo Room Divider Tutorial - Step 3


Tools for this step:

Chop Saw
Carpenter Square
Tape measure
Welder (We used a stick welder)
Grinder

Materials for this step:

3/8" metal rod 
        Per section for this step:
48 - approx. 4" pieces (You will have to measure to be exact)
Welding Rods
Plywood Sheet from step1
Scrap pieces of board from step 1

Continuing on

Cut a template to the size of your photos with a piece of scrap board. Ours is 4X6. Use this to place between the vertical rods where you want your frames situated.
The vertical rods should all be equal at 4" apart, so you can cut pieces of rod to this length and weld them in place.


Picture of 4" pieces of rod. I did grind some on the edges just to take off some of the burrs.


The welding in progress.

Ours have the outside 2 sections mirror images of each other and the inside 2 sections are identical.


Here ends step 3. That was a lot of putsy work
wasn't it. It actually doesn't look so bad the way it is, but we don't want any grandkids getting their heads caught, so we'll be adding rods in between.
Next Step, finishing up the vertical rods and hinges.


Sunday, March 21, 2010

Photo Room Divider Tutorial - Step 2


Tools for this step:

Chop Saw
Carpenter Square
Tape measure
Welder (We used a stick welder)
Power miter saw

Materials for this step:

3/8" metal rod 
        Per section for this step:
4 - approx. 52" (You will have to measure to be exact)
Welding Rods
Plywood Sheet from step1
Scrap pieces of board from step 1

Let's continue.


Place one section on the plywood sheet on a flat surface. Measure between the upper cross bar and the bottom and cut 4 rods to that length, as long as you measured across and the measurements are the same.


Place these pieces approx. 4" apart in the inside
of the section. They will be 2 1/2" or closer to the edges.
I designed this for 4X6 pictures, so,if you want different sizes, you'll have to adjust your measurements.
Use 2 scrap pieces of board cut to 4" to make sure all the inside rods are evenly spaced. Start with the center
space.


Weld in place. Repeat for the remaining sections.


It's coming along nicely. We got a lot done in this step.
Next step, even more cutting and welding.
A lot of putsy stuff!


Saturday, March 20, 2010

Photo Room Divider Tutorial - Step 1

Tools for this step:
Carpenter square        Tape measure                      
                                                                                  
   
Chop Saw
 
Adjustable Clamp            Welder                           
 
Wheel Rim                                             Drill  


Materials for this step:
3/8" metal rod (We used approx. 48' per section total)
        Per section for this step:
1 - 12'
2 - 19"
Welding Rods
4X8 sheet of plywood (This can be an old used piece)
6 - 2X6  pieces of lumber (each 12" -18" long, again, this can be scrap)
2" Screws


Let's begin.

Make 4 of these sections, or as many as you want
your room divider to be wide. Ours are each
approximately 19" wide by 5' 4" tall, so 4 are about
6' 4" wide.

This step takes two people. Mark the center of the
12' piece of 3/8" rod. Place the mark at the top of
the wheel rim and clamp it at that point. Now, while one person stands on the rim to keep it from moving, the other person bends the rod around the rim until the
sides are parallel. Be sure to OVER BEND, because
it will go out some when you let go. Remove the clamp  from the rod and place on a sheet of plywood.
Excuse the dirty clothes. We do not work in dress clothes.


Now you will make a jig or frame so that all your pieces
are uniform. Make sure you use the section with the
shortest side, because that will determine the height of
your room divider.
To do this, we started by screwing a 2X6 board square
to the top of the sheet of plywood. Bring the curved rod
to the bottom of this board and start working down one
side of the rod, screwing a board square to the side of
the plywood sheet.
A plywood sheet should have manufactured sides, so it
should be square. Do one more board on that side, then
move over to the other side, making your boards square
to the top board. Make sure the top boards are the same
distance apart as the bottom boards.  Finally screw the
last board across the bottom, in line with the bottom of the
shortest side of the rod. Make sure this board is square to
both the bottom side boards.


Next, measure the space just below where the rod starts to go straight and cut a piece of rod to fit between. Mark this place with a marker right on the plywood, square to the sides. If you've squared it up right, the space at the bottom should be the same.
Put the top rod in at your mark and weld. Put the bottom rod in up against the bottom board and weld. After the welding has cooled, cut off any overhang on the chop saw.


Here's a pic of my line on the plywood. In all subsequent sections, the top of the rod will be placed at the bottom of the line. This will make all the sections very close to the same.


So, this is what we have done so far. They look pretty  
even. The last one is on a different board, so it looks lower. We are well pleased with our project so far,

That's enough for step 1. The next step will be a lot of
cutting and welding.
Related Posts with Thumbnails