
Wednesday, May 5, 2010
STRAWBERRY JAR
I just finished making a "Strawberry Jar" I hate that they want big bucks to buy one, so I made my own. Doesn't look too bad if I say so myself. I entered it in the Instructables garden contest. Wish me luck.
 Find the instructions HERE.


Tuesday, April 27, 2010

Wednesday, April 21, 2010
DONE!!!! WELL, ALMOST

Now, the only thing I have left to do is get my pictures copied, colorized, printed, laminated and put in. I'm still waiting on one picture from a relative.
How do you like the heart, rings, and crosses? I used smaller diameter rod, clamped it and bent it around cylindrical objects to get my shapes. I felt it needed a little something in that top space; and since there will be wedding pictures going in the frames, I thought those shapes were appropriate.
In the end, I knocked a lot of clips off taking out the spreaders; which, by the way, I recommend using a pilers for, 'cause it's hard on the fingers. Even with the pliers they would snap back and hit my fingers. So, anyway, I tried several things to adhere the clips and I think all told what worked best was what I originally tried and that was King Kaulk (I wonder if that comes in black. On the website it says white and colors, but not what colors.). I think I switched at first because the clips were falling off as I painted, but I think I didn't have enough on. When I took the spreaders out, the ones in that panel stayed on the best; I think I only lost one. All the other panels I lost about one per frame!
My heartfelt thanks go to hubby, Gary, for doing all my welding. Maybe someday I'll have him teach me how to weld, but then it's nice that we can do things together.
Photo Room Divider Tutorial - Step 6
Tools for this step
 Paint (I used Rustoleum Hammered in Dark Bronze)
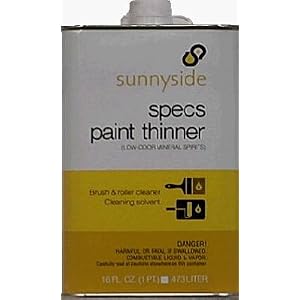
Paint thinner or turpentine
 Distilled white vinegar
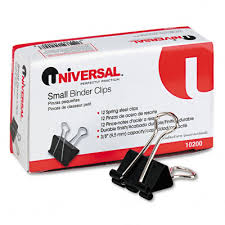 Binding clips

Steel Repair and Filler
.
Finally, the last step!
 Sand off any major imperfections with the emory cloth or sandpaper. Use a rag to clean the entire piece with paint thinner or turpentine. After the piece has dried, wash over it with a rag soaked in vinegar; this will help the paint to adhere better. When It has dried again, adhere the binding clips to the corners of each frame, to hold pictures; with steel repair and filler. Use a good amount or they won't stay stuck.
Paint with your desired paint. I used Rustoleum hammered paint because it is supposed to hide flaws and imperfections found in scratched, rusted, or pitted metals. It also did not require a primer. So, if you go with another type of paint, you may need a primer also. The silver spreader tabs on the binder clips are removable, so, you can paint over the clips and take them off after you've used them to open the clips to put the pictures in. Once you have your pictures inserted, you can take them out and have a clear view of your pictures
If I were to do this again, I'd change a couple things.
#1 If I used brush on paint, I'd put the clips on after and do some touch-up. I had trouble with the clips coming off unless I was really gentle painting around them.
#2 Better yet, I'd probably spend the extra money and go with spray paint. They do make the hammered in a spray paint.
Paint brush
Rags
Plumbers Abrasive Mesh, Emory cloth or sandpaper
Materials for this step
Paint (I used Rustoleum Hammered in Dark Bronze)Distilled white vinegarBinding clipsSteel Repair and Filler
.
Finally, the last step!

Paint with your desired paint. I used Rustoleum hammered paint because it is supposed to hide flaws and imperfections found in scratched, rusted, or pitted metals. It also did not require a primer. So, if you go with another type of paint, you may need a primer also. The silver spreader tabs on the binder clips are removable, so, you can paint over the clips and take them off after you've used them to open the clips to put the pictures in. Once you have your pictures inserted, you can take them out and have a clear view of your pictures
If I were to do this again, I'd change a couple things.
#1 If I used brush on paint, I'd put the clips on after and do some touch-up. I had trouble with the clips coming off unless I was really gentle painting around them.
#2 Better yet, I'd probably spend the extra money and go with spray paint. They do make the hammered in a spray paint.
I will have pictures later this afternoon.
Saturday, April 17, 2010
FRUSTRATION!!!
I'm frustrated with the weather. It's either too cold or windy to paint. When the day is good, I have places to go; people to see; things to do. Who'd thought the finishing part of this project would take so long? Rest assured, I will get this DONE! I'm so close; 1 panel painted except for the 2 spots I was hanging from, 3 panels to go. I am still in need of one photo and can't do any of them until I have them all, 'cause I want them all to be the same color and have to put them on a collage and turn black and white together, then colorize. Wish me luck with that part. So, maybe if the wind dies down today, I can do some work on it.
Wednesday, April 14, 2010
SIBLING BLOG
Moved the PLANS page to a new blog, so I can post each one separately. Check out my first plan!
http://designsanddrafts.blogspot.com/
http://designsanddrafts.blogspot.com/
Sunday, April 11, 2010
Feelin' HOT, HOT,HOT!

Niiice! Check out that raccoon face!
Went to an auction yesterday and this was one of my acquisitions.
Mostly from the sun, but I guess a little from wind also.
Anyway, by the time Gary got there to help me with stuff, all he wanted to do was check out the hidden treasures I had purchased. SERIOUSLY! He was like a kid at Christmas! I wanted him to look at some more stuff on the auction wagon, and he just wanted to sit over with "his" boxes, going through stuff. My biggest purchase was a kicker wagon. Still only spent $2.50 more on everything than what we decided we would spend on the wagon alone. WooHoo!
It's going to be a nice day again today, so I have to get the lawn picked up and mowed. The plan is to pick up the big twigs and collect the rest with the mower/catcher. That is; provided Gary gets the mower going. Right now it's sitting down by the barn with a flat tire and won't start. If I have any time left this afternoon, maybe I can paint some more, but priorities are priorities and the lawn comes first!
Subscribe to:
Posts (Atom)


 Posts

